Burn PPT to DVD - Convert PPT to Video
- English
- Deutsch
- français
- español
- italiano
- português (Brasil)
- русском
- 日本語
- 한국어
- Türkçe
- Dansk


How to Make Christmas Memory DVD Photo Album with PowerPoint

- PPT to DVD Burner Pro
- · Burn PPT to Blu-ray/DVD with Blu-ray/DVD Menu
- · Convert PPT to Video in any formats
- · Play PowerPoint presentation on TV
- · Add personalized logo on output Blu-ray/DVD


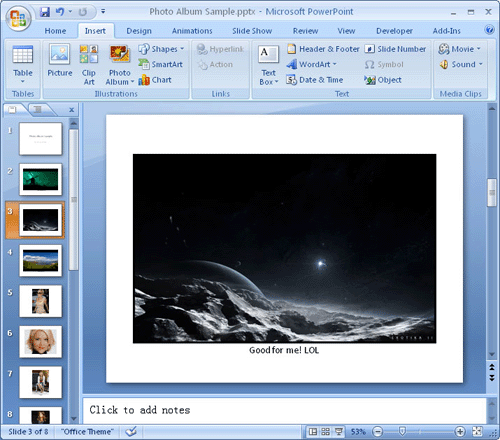
You must have taken a lot of photos on Christmas! Leave them at random on your computer? No, you'd be wiser to get these merry memories well organized. Managing the Christmas photos in polish DVD is a no brainer so long as you have Microsoft PowerPoint plus an extra conversion app like Moyea PPT to DVD Burner. PowerPoint has the Photo Album feature that allows you to add in as many holiday photos as you like and arrange them in order. The PowerPoint to DVD Burner empowers you to burn the Christmas digital album to DVD for your easy sharing with family and friends on home TV.
PowerPoint from Version 2000 to 2007 shares the feature of saving your photos as an album. Now I would give you a step-by-step guide of creating an awesome Christmas DVD photo album with PowerPoint 2007.
Step 1: Add photos for the Christmas PowerPoint album

Click on the 'File/Disk…' option and locate the photos on your computer. You can add multiple pictures at one time. It is strongly recommended that you optimize the pictures in Photoshop/Gimp before insertion. For example, compress photos of high but unnecessary resolution at 3 million to a lower resolution at 800x600. This will help reduce the size of your PowerPoint photo album.

Step 2: Choose an album layout for the Christmas slideshow
- In the Album Layout section, choose a layout for your holiday photos on each slide. You can also adjust the sequence of the pictures with the up and down arrow keys below the Preview pane, rotate the pictures, or reset the brightness and saturation. A layout preview is shown on the right side of the dialog box.
- To change the theme of the current template, click the Browse button. Locate the template in the 'Choose Design Template box' that allows you to navigate to the folder where the downloaded templates are stored. Choose any of the three templates.
- Next, click on 'Create' button. Done. Your Christmas PowerPoint photo album is created!

Step 3: Burn the Christmas PowerPoint album to DVD
One more step - To finalize your Christmas memory photo album in DVD. You know, PowerPoint is not friendly to email or x-platform playback. Burning your cherished holiday photos to DVD will make it an ease for distant distribution and perfect playback on any PC, even at a big-screen TV.
For cheap and cute conversion, you can use PowerPoint to DVD Burner from Moyea Software. If you don't bother to trouble, you can make it a regular video, with screen-recording software like Camstudio which can save the Christmas video in AVI format. Then, burn the video to DVD using Nero/Roxio.
Several Additional Tips:
- Choose different layouts for different pictures. Big landscape pictures deserve a whole slide, while other pictures may share a single slide.
- Beautiful PowerPoint templates can make your Christmas photo album shining.
- Add exact text titles and descriptions, since photos cannot convey every meaning.
- Take care of the disc that stores your Christmas DVD photo album.
 Recommended Product
PPT to DVD Burner Pro
Burn PowerPoint files to DVD or Blu-ray Disc, and convert PPT files to video of any format.
Learn More Free Trial
 Product List
-
For Business/Professor/Individual
- PPT to DVD Burner Pro
- PPT to Video Converter
- PPT to DVD Burner Lite
- PPT4Web Converter
- DVD SlideShow Builder Deluxe
- PPT to DVD Education
- PPT to Video Education
For Education
- Best use of PowerPoint for Trade Fair
- Promote your business using PowerPoint
- Upload PowerPoint to Youtube
- Three methods to view PowerPoint on TV
- Why PowerPoint Presentation to DVD
- PowerPoint Verions Puzzle
- Import PowerPoint to Windows Movie Maker
- Create a DVD Photo Album for Christmas
- Six Approaches to Putting PowerPoint on Web
- Xmas Videos that Fit to Friends that Matter
- DVD show: special Xmas gift for students
- Choose chapter scheme


